RecordCast Review: Easy to Use Screen Recording Tool (2022)
Anúncios
In this RecordCast review, let’s find out if this screen recording tool is easy to use and worth using
Compared to text-based content, audio-visual content works best for educational purposes. When you want to create a tutorial for your online course, one of the best ways to do that is to record yourself while talking about the topic you are covering. That’s when we came across RecordCast as one of the best alternatives for screen recording tools.
Anúncios
In this article, we will also provide a simple tutorial to use RecordCast for screen recording and video editing and let you decide if this is the right tool for you.
Without further ado, let’s dive in!
Anúncios
What is RecordCast?
RecordCast is an online screen recording tool to capture screen activities with just one click. Since RecordCast is a web-based application, you can use it without downloading or installing any software or extension.
RecordCast is handy if you’d like to create several short videos (under 5 minutes) for free. However, for a longer duration, you might want to upgrade your account to record up to 30 minutes, which we think is affordable for less than $50 per year.
In terms of use cases, you can use RecordCast for:
- Recording online meetings
- Recording video tutorials
- Screen recording for e-learning
- Recording your gameplay
- Record a presentation
- Simple video editing
In short, you can rely on RecordCast for everything that needs screen recording activities. We will cover more about its features in the next section.
RecordCast Features
Several RecordCast features are noticeable and worth using even with the free version. The only limitation is the time constraints since you can only record up to 5 minutes. However, most short tutorial videos don’t take that long, so we think these features pretty much cover everything you need for a simple video recording.
Simple User Interface
After signing up and logging into your account, you will see a clean and neat user interface of RecordCast. Just take a look at this screenshot below.
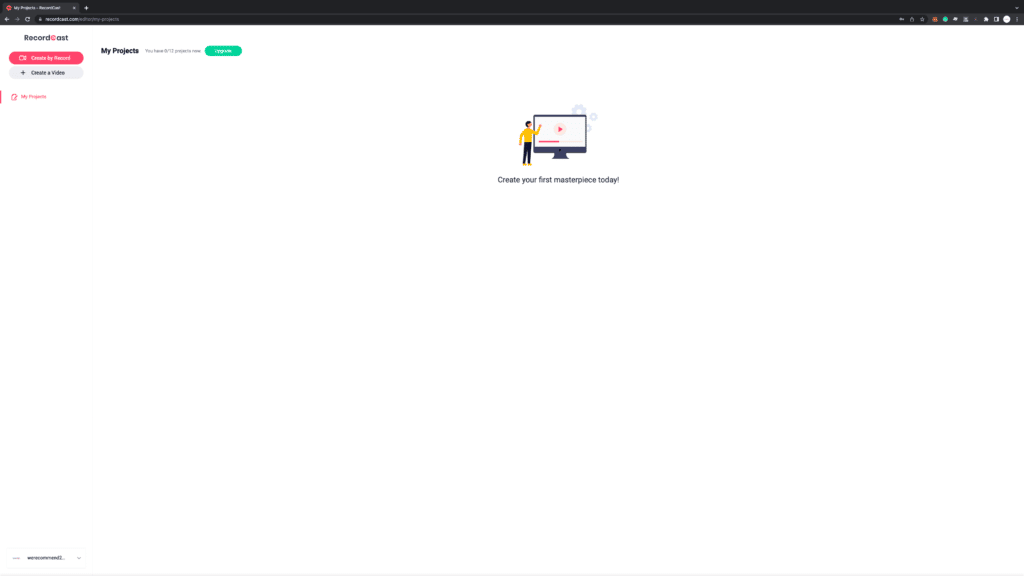
As you can see, there are only two buttons; Create by Record and Create a Video and one Project menu inside RecordCast. A clean user interface will help you navigate easily through RecordCast, and it surely helps beginners like us to do everything.
3 Recording Modes

There are three recording modes you can choose to record your video. These are:
- Screen + Webcam Mode. This mode allows you to record your screen and yourself through your webcam. It’s the most used mode for any tutorial video. The reason to record yourself is to give a human presence in your tutorials. Showing yourself provides a lot of benefits in terms of trustworthiness and credibility.
- Screen Only Mode. Another mode you can use is to record what you’re doing on your screen. This mode is suitable for more technical tutorials, such as teaching how to set up a website from scratch or providing a step-by-step tutorial to use a program.
- Webcam Only Mode. The last mode is to record yourself while talking on your webcam. This mode is handy when you’re in meetings or giving presentations to a particular audience. If you’re running coaching sessions, having the ability to record yourself and share it with your client is a valuable addition to your service.
Simple Video Editor
Just in case you want to make simple editing on your recordings, you can use the built-in video editor inside RecordCast. You can click the Create a Video button and start editing your video. More importantly, the user interface is easy to navigate for beginners like us. RecordCast’s user interface reminds us of Apple’s iMovie. Take a look at this screenshot below.
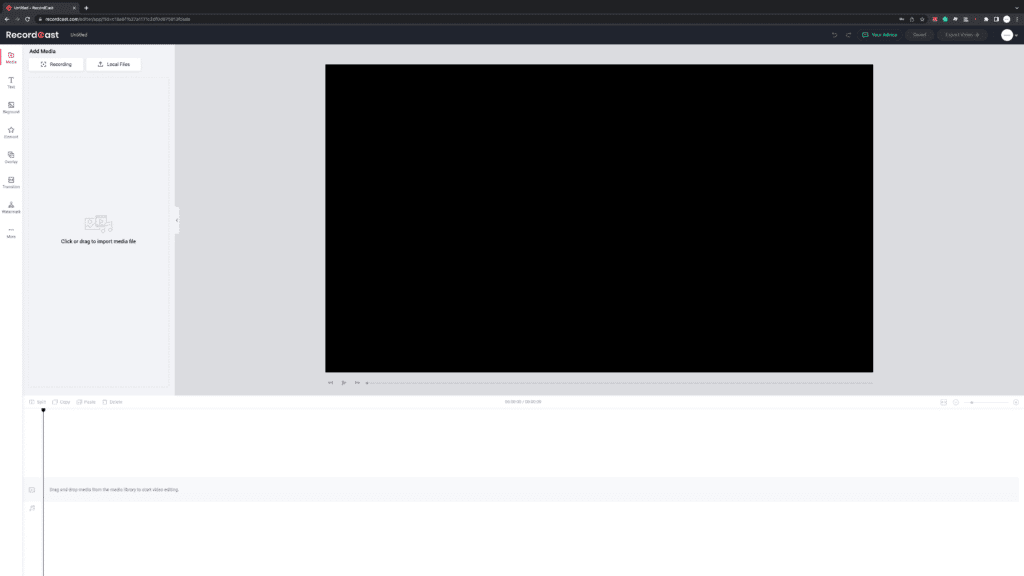
You can easily import your media file and edit your video in the timeline area. Moreover, you can also add text, modify backgrounds, add elements, overlays, and transitions, and watermark your video to prevent someone from stealing your content.
RecordCast Tutorial
To use RecordCast, you don’t have to create an account. But, if you’d like to save, download, and or edit your video, you can sign up and create an account for free.
Step 1: Select Your Recording Mode
In this tutorial, let’s try to record a short video on creating a presentation title page using RecordCast. We’ll use the screen-only mode for this tutorial.
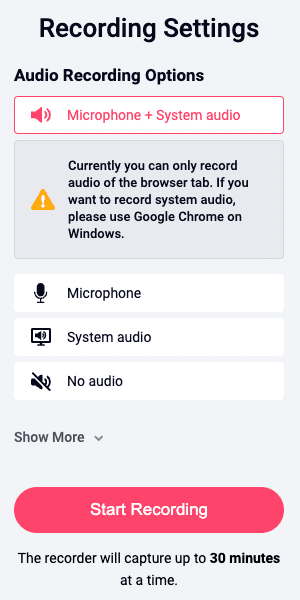
After that, you can choose your recording settings for audio recording. As you can see from the screenshot above, there are four options you can use.
- Microphone + System Audio
- Microphone
- System Audio
- No Audio
Choosing the microphone and system audio will allow RecordCast to record your voice from the microphone and your audio through the system. We believe most people will use this option to record their videos. In this case, we’re not recording any audio. So, let’s hit the Start Recording Button.
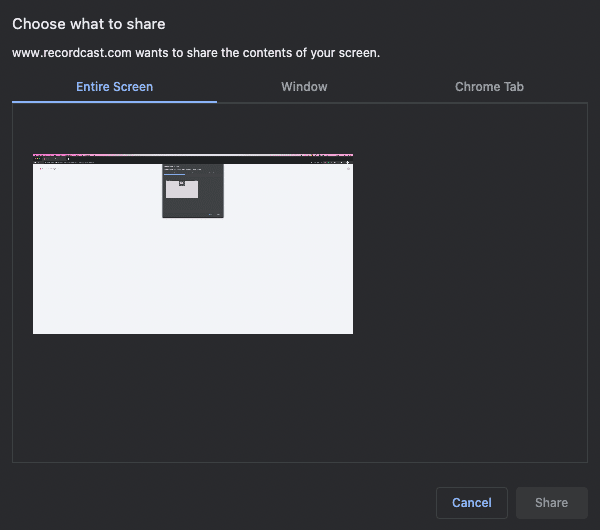
Before recording your video, there will be an option to choose what you are going to record. Is it the entire screen, only a window, or one of your Chrome tabs?
If you select the entire screen, you will record everything you are doing on your screen. You don’t have to worry about this since you can always edit your recording later to showcase the best part of your recordings.
Step 2: Start Recording
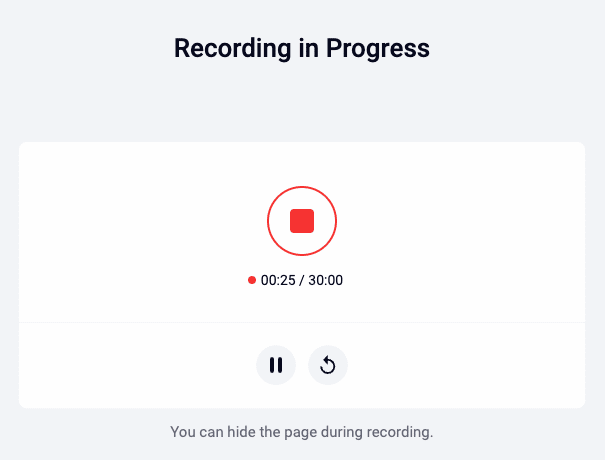
When your recording has started, you will see a page like in the above screenshot. This page acts as the timer of your recording sessions. If you’re not satisfied with your recording, you can click the re-record button to do it again. You can also pause your recordings and continue from where you have left.
Step 3: Editing Your Video
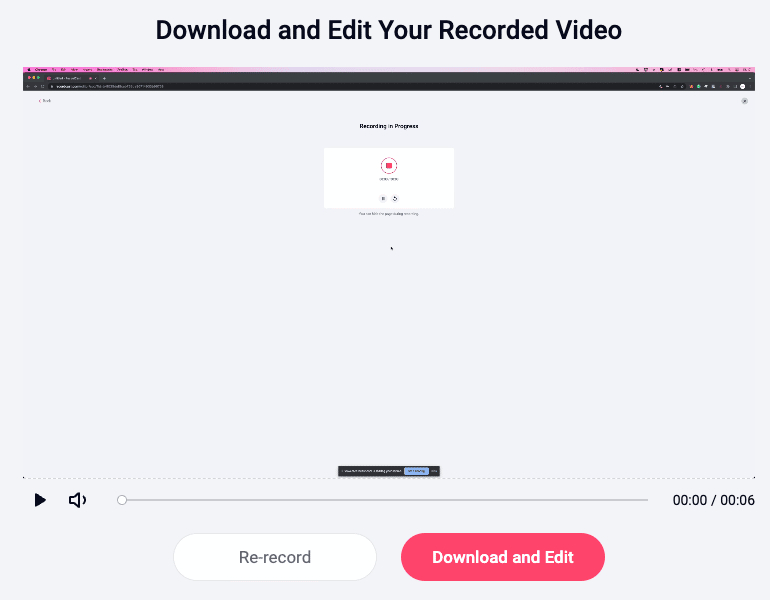
After you have finished recording, you will see the page like in the screenshot above. You can preview the result or re-record everything. If you are satisfied with your recording, you can proceed to edit your video and convert them right away.
Step 4: Exporting Your Video
The final step is to export your video. You can export your video in 3 different sizes; 480p, 720p, or 1080p. Since a free member can’t export their video to 720p or 1080p, you can try to export your video with a RecordCast branding. This method allows you to get 1080p for free! Here is the result of our short recording sessions.
As you can see, the branding is very subtle and doesn’t interrupt our video in any form. We strongly recommend you try it for yourself.
RecordCast Pricing
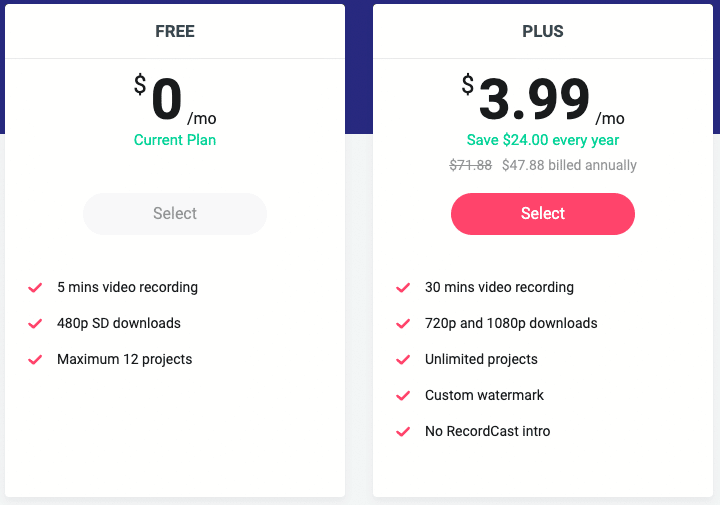
As you can see, RecordCast only has one pricing option to upgrade your account. We previously mentioned that it is affordable at only $47,88 per year. It’s better than paying monthly at $5,99 per month.
Even though you can use RecordCast for free, there are several limitations, especially the video recording quality. You only get 480p quality, which is outdated. That’s why upgrading your account to Plus is worth considering.
RecordCast Pros and Cons
We have several pros and cons of using RecordCast for recording videos. These are purely our opinion based on our experience and testing.
Pros
- Easy to use.
- Suitable for short recording sessions.
- RecordCast has an affordable upgrade plan at less than $50 per year.
- The built-in video editor is also easy to use for simple editing.
Cons
- 480p screen recording resolution is outdated.
- The maximum length of recording is only 30 minutes.
Frequently Asked Questions
Can you use videos made with RecordCast for commercial purposes?
As long as you own the copyright to all content you made with RecordCast, you can use all RecordCast resources for free.
What payment processing option does RecordCast accept?
You can make payments for upgrading your plan on RecordCast using your credit card and PayPal.
Does RecordCast have a refund policy?
Yes. RecordCast offers a 7-day money-back guarantee from your initial purchase date.
Conclusion
To summarize our RecordCast review, RecordCast is easy to use and worth trying for free. It has everything you need to record your screen for creating online courses, tutorials, and more. However, it is worth considering upgrading to the Plus plan for less than $50 per year. You can create unlimited projects and download 1080p recordings with a custom watermark on your video.
